On This Page
Hosted Fields Quick Start Guide
This quick start guide provides essential information and guidance for integrating hosted
fields into your e-commerce system. Hosted field integrations offer customizable
checkout experiences with low levels of PCI compliance overhead. Using hosted fields,
sensitive information is placed within an isolated iFrame supplied by Smartpay Fuse. All
data is processed by Smartpay Fuse, so no cardholder data is included in your servers or
service.
Recent Revisions to This Document
- Version 25.07.01
- Initial release of the guide.
Overview
Flex Microform is Smartpay Fuse’s hosted field solution that allows you to securely
tokenize card data for immediate and future payments. When a customer submits their card
details, the information is replaced by a card token to use for API requests instead of
the actual card number.
When Flex Microform is integrated in your system:
- Server-side request: Your server sends a request to Smartpay Fuse. This creates a time limited, signed JWT (the “capture context”) that encodes key parameters of the transaction, including transaction details, target origin and one-time use public keys. You can safely pass this JWT to your front-end application.
- Client-side implementation: Embed the Flex Microform JavaScript library in your page and initialise it with the “capture context” generated by your server-side request. The library renders the necessary iFrames within designated containers on your page. When the customer submits the form, the library generates a PCI-compliant transient token representing the cardholder details, which is valid for 15 minutes.
- Validate and use the transient token: Use this transient token in your service to make API calls and progress the transaction.
For more information and guidance on integrating Flex Microform, review the Key
Information and Getting Started sections in this guide.
Key Features and Benefits
Flex Microform provides these benefits:
- Minimal PCI overhead
- Accepts a wide range of card types such as American Express, Mastercard, and Visa
- Card capture page customization
- An integration process that is not as complex as the REST API integration process
- Back-end APIs for control of payment processes using card tokenization
Integration Feature Comparison
The Flex Microform integration is one of several methods to accept payments on your site.
Smartpay Fuse offers additional methods that provide different features. Before you
start your integration, make sure you choose the right method for your needs. If the
capability you need is not supported with the REST API, consider using one of the
alternate integration methods.
For more information about these integration options, refer to these quick start
guides:
- E-commerce Plugins: provides an easy integration for supported e-commerce platforms.
- Virtual Terminal: no integration is required because servicing agents take payments using our back-office portal, Smartpay Fuse Portal.
- REST API: full, back end integration using our REST API.
- Hosted Payment Page: requires minimal integration because you initiate the payment page, which handles the entire payment flow.
Contact us if you have questions about Flex Microforms.
This table provides a comparison of the features that are available in the different
integration methods.
Integration Methods | |||||
Features | Virtual Terminal 1 | E-Commerce Plugins | Hosted Payment Page | Direct REST API | Hosted Fields |
PCI overhead | SAQ C-VT | Mixed 2 | SAQ A | SAQ D | SAQ A 3 |
Transaction Types | |||||
Authorization only | Yes | Yes (all) | Yes | Yes | Yes 7 |
Authorization and capture | Yes | Yes (all) | Yes | Yes | Yes 7 |
Tokenise card (COF) | Yes | Yes | Yes 4 | Yes | Yes 7 |
CIT (initial/subsequent) | Yes | Yes | Yes 4 | Yes | Yes 7 |
MIT (continuous authority) | No | Some 6 | No | Yes | Yes 7 |
Refund (standalone) | Yes 8 | Some 6 | REST API & Smartpay Fuse Portal 1 | Yes | Yes 7 |
Refund (existing transaction) | Yes | Yes (all) | REST API & Smartpay Fuse Portal 1 | Yes | Yes 7 |
Reversal | Yes | Yes (all) | REST API & Smartpay Fuse Portal 1 | Yes | Yes 7 |
Capture of standalone authorization | No | Yes (all) | REST API & Smartpay Fuse Portal 1 | Yes | Yes 7 |
3-D Secure (v2) | N/A | Yes (all) | Yes | Yes | Yes 7 |
Account validation | N/A | Some 6 | Yes | Yes | Yes 7 |
Basic fraud rules 5 | Yes | Yes (all) | Yes | Yes | Yes 7 |
Low value exemptions | N/A | No | Yes | Yes | Yes 7 |
AVS/CSC Auto Reversal/Blocking | Yes 8 | Yes 6, 8 | Yes 8 | Yes 8 | Yes 7, 8 |
Digital Wallets | |||||
Apple Pay | N/A | Some 6 | No | Yes | No 7 |
Google Pay | N/A | Some 6 | No | Yes | No 7 |
Card Types | |||||
Visa | Yes | Yes | Yes | Yes | Yes |
Mastercard | Yes | Yes | Yes | Yes | Yes |
American Express | Yes 8 | Yes 8 | Yes 8 | Yes 8 | Yes 8 |
Channels | |||||
E-Commerce | No | Yes | Yes | Yes | Yes 7 |
Moto | Yes | Some 6 | Yes 8 | Yes | Yes 7 |
Notes:
1 - The Smartpay Fuse Portal is our back-office servicing portal.
2 - Different plugins use different integration methods. Please see te Hosted Payment
Page, Hosted Fields (Flex Microform) and REST API guides for more details on the PCI
implications of those integration approaches. If you are in any doubt about PCI, please
get in contact.
3 - SAQ A when using Flex Microforms to tokenize from web applications.
4 - Secure Acceptance Hosted Checkout can create tokenise from initial CIT transactions
that can be used for subsequent CIT transactions.
5 - Basic velocity rules via Decision Manager only available to SME clients; advanced
fraud check and TRA on a case by case base.
6 - Only available on some of our plugins, please see individual plugin solution
pages.
7 - Flex Microform simply allows card numbers to be tokenised in a PCI safe way; using
the resulting transient token to process or manage the transaction is done with the
direct integration REST API.
8 - These features are not enabled out of the box and need further configuration by
support teams, please contact support.
Payment Flow
Using Flex Microform to take payments requires a combination of front-end and back-end
integration. You need to collect the cardholder's details in your front-end application,
send these details through the JavaScript library to tokenize card details, and then
complete the transaction using the token with our back-end APIs.
The figure below shows the stages of the payment flow using Flex Microform.
- The customer processes their order on the merchant website.
- The merchant website requests Smartpay Fuse to generate the capture context JWT.
- Smartpay Fuse creates a payment capture context JWT.
- The merchant serves the payment page to the customer.
- Microform JavaScript intitializes with capture context and the customer enters their card details.
- The Microform JavaScript library tokenizes the payment card.
- Smartpay Fuse returns the token.
- The client-side code sends the token to the merchant server.
- The merchant server uses the token to process the payment.

PCI Compliance
This integration option uses a PCI SAQ A level of compliance when used to host payment
form frames on a web page.
Card details are entered on a customer browser and are sent directly to Smartpay Fuse.
Flex Microform hosted fields are rendered in secure iFrames that are hosted by Smartpay
Fuse. When the form is submitted, payment data is submitted directly to Barclaycard, and
never touches your systems.
If you have any questions or concerns about the PCI implications of using Flex Microform,
contact us.
Step 1: Create a Sandbox Account
Creating a sandbox account allows you to start a programmatic integration to our
platform and provides access to the
Smartpay Fuse Portal
Virtual Terminal.- Visit our sandbox creation page: sandbox.html.
- Complete the registration form, accept the terms and conditions, and clickCreate Accountto create your sandbox account.
Step Result
You receive an automated email from our partner, Cybersource. This email includes instructions for your first log in and password reset. If you do not receive the email within five minutes after you submit your form, check your email junk folder.
AFTER COMPLETING THE TASK
Continue with
Step 2: Log In to the Smartpay Fuse Portal
.Step 2: Log in to the Smartpay Fuse Portal
Smartpay Fuse Portal
- Log in to the Smartpay Fuse Portal (ebc2) using the username and password you created for your sandbox account.
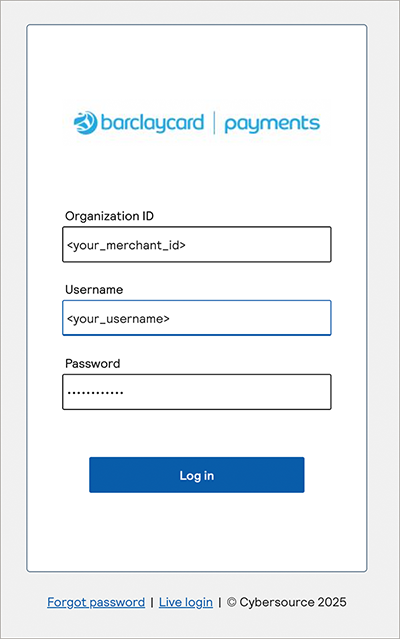
- When prompted, set a new password for your Smartpay Fuse Portal account.
AFTER COMPLETING THE TASK
Continue with
Step 3: Create Flex Microform API Keys
. Step 3: Create your Flex Microform API Keys
- Choose from the left navigation menu. The Key Management page displays. The initial view displays keys that were previously created on the account. You can search for keys using the key type and the date range for which the key was created.
- To generate a new key, select theGenerate Keyicon on the top right-hand side of the Key Management page.

ADDITIONAL INFORMATION
A Create Key page displays, which provides a selection for different key types. For REST API integrations, select a key type from the REST APIs section on the page.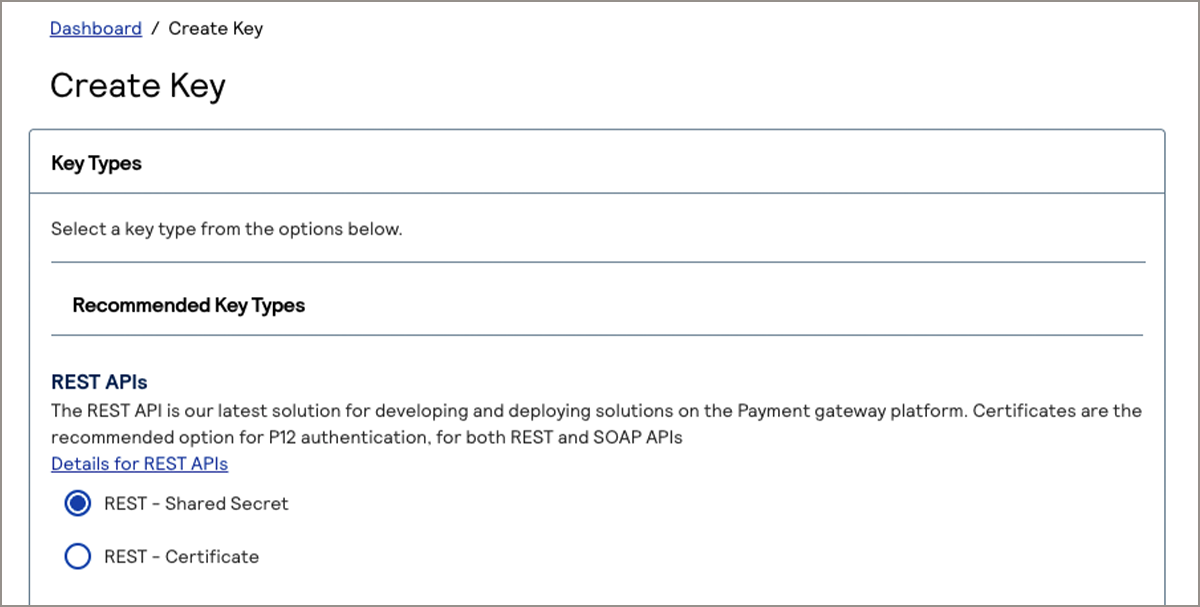
- Choose one of these key types from the REST APIs section of the Create Key page:
- Shared Secret:creates a key id and shared secret keypair used to sign HTTP requests.
- Certificate:creates a PKCS12 certificate used for digitally signing API requests
- Scroll to the bottom of the Create Key page and clickGenerate Key.
Step Result
Your new keys are generated and displayed. Two keys are required for Flex Microform authentication:- A key id that is used to identify your new REST key in API requests.
- A shared secret that is used to digitally sign API requests.
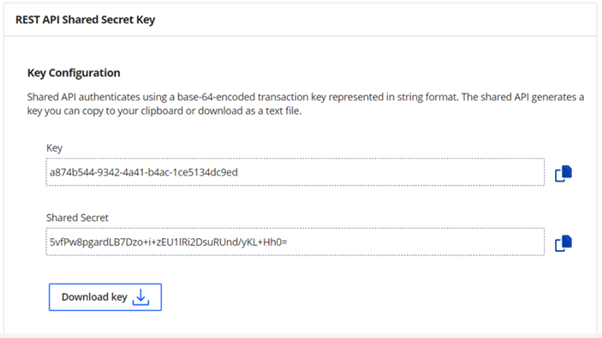
- Copy and download the REST API keys.
ADDITIONAL INFORMATION
These REST keys must be stored securely in theSmartpay Fuse Portal. They allow API access to your service and must be treated as highly sensitive information. Adhere to API key management best practices to store and manage these keys.If you clickGenerate another key, the Create Key page displays and allows you to generate new keys. Your keys have already been generated if this window displays. In this case, it is safe to clickCancelor navigate to other pages.
AFTER COMPLETING THE TASK
Continue with
Step 4: Test the Integration using Flex Microforms
.Step 4: Test Your Integration: Tokenize a Card Using Flex Microform
Before you begin:
- If you use the PHP sample application code, use version 5.6 or greater.
- Install the cURL, JSON, and APCU extensions.
- Create your test account (seeStep 1: Create a Sandbox Account).
- Generate your API keys (seeStep 2: Log In to the Smartpay Fuse PortalandStep 3: Create Flex Microform API Key.)
Successfully processing a test transaction confirms that your credentials
are valid and your Flex Microform implementation is correct. You can use sample
application code to test basic transactions. Sample application code is available in
these languages:
These samples use the Cybersource brand because Smartpay Fuse was created in
partnership with Cybersource.
Each repository above will have README content
associated, with instructions on how to deploy, configure, and run the
examples.
Use the Microform sample code when implementing Hosted Fields. The
sample code uses flexjs, which is a different integration approach. If you are
interested in using the flexjs integration approach, please contact us.
- Download the sample application code from GitHub.
- Unpack the example code and check all file permissions.
- Edit the file ExternalConfiguration.php and replace the apiKeyId, secretKey and merchantID default values with the values that are generated when you created your credentials inStep 3: Create Flex Microform API Keys.
ADDITIONAL INFORMATION
$this --> merchantID = "<REPLACE WITH YOUR MERCHANT ID>" $this --> apiKeyID = "<REPLACE WITH YOUR REST API KEY ID>" $this --> secretKey = "<REPLACE WITH YOUR REST API SECRET>" - Update the currency value to the value you will use to make a payment:
- Edit php-microform/paymentWithFlexTransientToken.php.
- Change the currency value to "GBP".
- Upload the updated PHP sample code to your web server or run the code on localhost.
ADDITIONAL INFORMATION
If you plan to deploy the code somewhere other than http://localhost, set the value of the targetOrigins field to that location when you create the server side content. - Use composer to ensure dependencies are up to date (see README.md).
- Deploy to your web server or run standalone (see README.md).
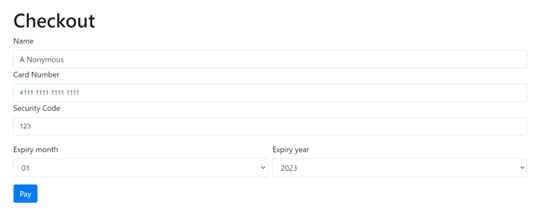
- Navigate to the URL hosting the application to see the sample web page that includes the microform fields. For example, if you run the application on localhost, navigate to this URL: checkout.php.
- Use a test card number and associated information provided in our Testing Guides (testing-guide.html) to process a test transaction. Enter the information in the Checkout page and clickPayto process the transaction.
ADDITIONAL INFORMATION
ADDITIONAL INFORMATION
The sensitive card details are sent to Smartpay Fuse. Smartpay Fuse creates the token to safely pass through your system.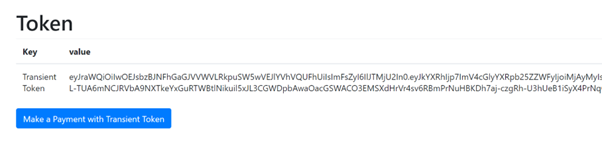 For this test, the token is returned and displays on the response page. You can proceed toStep 5: Test Integration Using a Tokenized Payment Cardto use the token to perform a transaction, or choose theMake a Payment with Transient Tokenbutton to process a transaction.In a live system, you will capture this token in the browser, return it to your back-office system, and continue the payment process using our REST API.
AFTER COMPLETING THE TASK
Continue with
Step 5: Test Integration Using a Tokenized Payment
Card
.Step 5: Test Your Integration: Process a Payment Using the REST API
In
Step 4: Test Integration using Flex Microforms
, you successfully
tokenized a payment card. You now have a transient token that can be safely passed
through your back-end system and used to make a payment. Because this transient token
represents a payment card rather than the card itself, it is safe to transmit this
information through your system, only incurring SAQ A level PCI overheads.To process
a payment using the transient token, you need to use our REST API. This method
allows you to progress and control the lifecycle state of a transaction from your
back end system.
There may be additional steps that require further consumer
and browser interactions, including fraud and Strong Customer configuration. These
configurations can be complex flows to implement, so you might consider using our
fully hosted payment page integration method. For more information, see the Secure Acceptance Hosted Checkout Quick Start
Guide.
To process a payment using the transient token created in
the previous step, use the standard ‘process payment’ REST message and replace the
card details with the transient token JWT. For example:
{
      "clientReferenceInformation": {
      "code": "TC50171_3"
   },
      "processingInformation": {
      "commerceIndicator": "internet"
   },
      "orderInformation": {
         "amountDetails": {
            "totalAmount": "22",
            "currency": "GBP"
         },
         "billTo": {
            "firstName": "John",
            "lastName": "Doe"
         }
      },
      "tokenInformation": {
         "transientTokenJwt": ""
      }
   }
You can also test this in the live console using the credentials you created in
Step 3: Create Flex Micorofm API Keys
and the token you generated in
Step 4: Test Integration using Flex Microforms
.An introduction to
the request builder is available here.
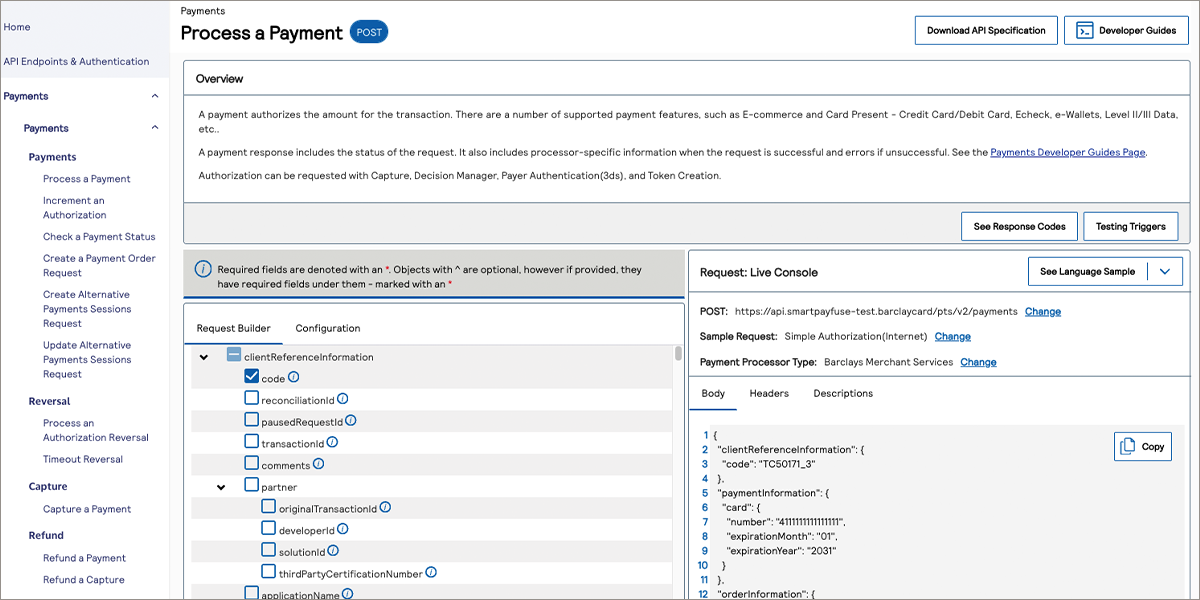
To demonstrate use of this
tool, we will perform a simple sale transaction using the POST method on the
/payments endpoint.
- Open the Process a Payment page in the request builder.
- Click theConfiguretab at the top of the REST API Reference to configure the transaction you want to process:
ADDITIONAL INFORMATION
- URL: The target API URL. This is the destination endpoint of any API requests generated by the request builder.
- Sample Request: The request type. This triggers the request builder to populate the request with appropriate fields.
- Payment Processor Type: The Payment Processor. Select Barclays Merchant Services.
In this example we will be performing a simple authorization of the card that you tokenised using the Microform; the card that is now represented by your “transient token” JWT.See the example below for the simple authentication transaction we will run in this example: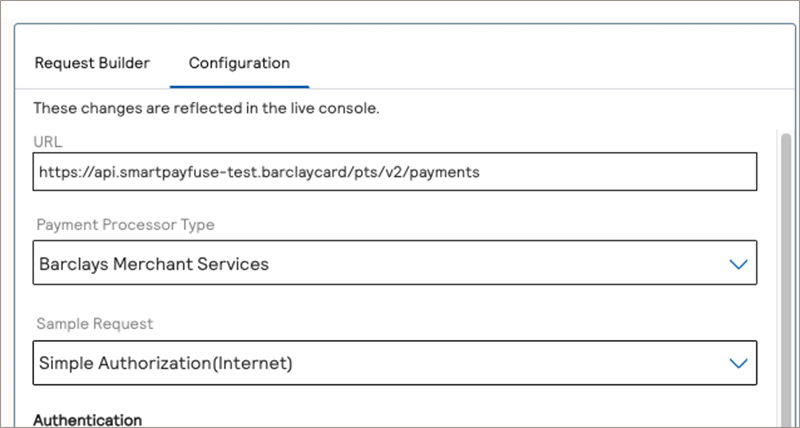
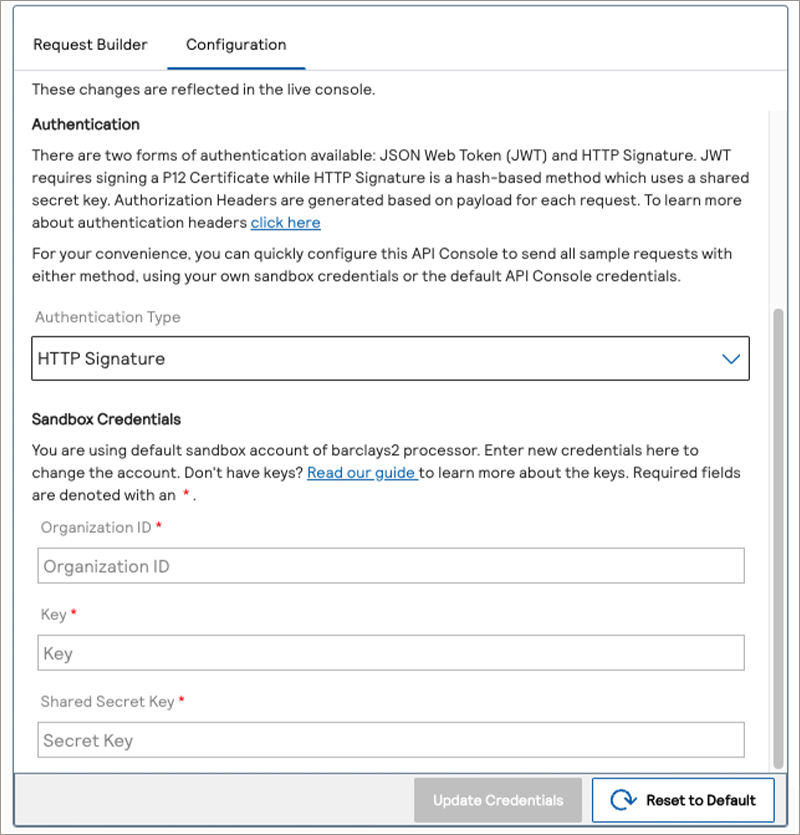
- Continue on to configure API credentials by scrolling further down in the “Configuration” tab to the Authentication section.
ADDITIONAL INFORMATION
Enter the credentials required to authenticate any request to Smartpay Fuse. Complete the below fields:- Merchant ID: Enter the Merchant ID generated during your account creation.
- Key: Enter the REST API Key ID you created inStep 3: Create Flex Micorofm API Keys
- Shared Secret Key: Enter the REST API Secret you created inStep 3: Create Flex Micorofm API Keys
- Because the standard live console test is set-up to process a card number, you will need to modify the JSON payload in the “Request: Live Console” window. See the example below:
ADDITIONAL INFORMATION
{ "clientReferenceInformation": { "code": "TC50171_3" }, "orderInformation": { "amountDetails": { "totalAmount": "102.21", "currency": "GBP" }, "billTo": { "firstName": "John", "lastName": "Doe", "address1": "1 Wokes Street", "locality": "Fleet", "postalCode": "GU51 WKS", "country": "GB", "email": "[email protected]", "phoneNumber": "4158880000" } }, "tokenInformation": { "transientTokenJwt": "THE JWT RETURNED FROM YOUR MICROFORM INTERACTIONT" } } - Click on theSendbutton to send the request to Smartpay Fuse.
ADDITIONAL INFORMATION
The live console takes care of the message digests, the required HTTP headers and message signatures allowing you to test transactions without coding the exchange in an application. See the below figure for a successful response. An unsuccessful response may occur if you did not enter a valid card expiration date or if you used different test data than those provided in the sandbox testing guide.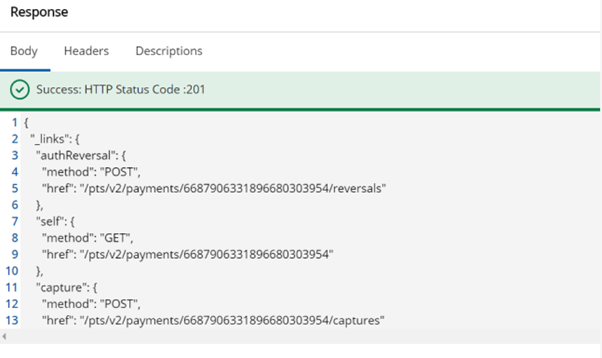
- Log in to the Smartpay Fuse Platform and check that the transaction ran in the Transaction Management view:
ADDITIONAL INFORMATION

RESULT
Congratulations, you have processed a transaction using a Flex Microform test
application and the REST API through the online request builder.
For additional
resources and guidance with integration, see the Further Information
section.
Further Information
- : provides information about the REST API and how to set up the REST API.
- Smartpay Fuse REST API Reference: provides an easy-to-use interface to generate and send requests to process multiple transactions.
Code Samples
Testing Resources
- Testing information: provides test card numbers and testing instructions.
- Test Cases for 3-D Secure 2.x: provides Payer authentication test scenarios for 3-D Secure 2.x
Developer Guides
Flex Microform Developer Guide: provides
complete information about integrating Flex Microform into your payment system.
If you have questions about Flex Microform or need guidance for your integration, contact us.